
Summer Reading Program approaches rapidly, and at my library we are following the CSLP “Color Your World” theme, so we are focusing most of our summer programming on art.
This was terrifying to me because an artist, I am NOT. I can barely draw stick people successfully, so believe me when I tell you that you need NO art skills whatsoever to do this program. In fact, I chose Picasso as my program inspo because when it comes to cubism, it’s 100% totally fine if the thing you are painting looks … well, NOTHING like the thing you are painting!
What You Will Need:
- Canvas paper, canvases or VERY sturdy card stock. I highly recommend canvas paper, as it is versatile, comes in fairly inexpensive stacks and is readily available at most craft stores.
- Art markers, acrylic paint pens or acrylic brush pens. I strongly prefer acrylic brush pens but that is a personal preference. You can use paint and brushes, but these will make it more difficult for your patrons who are not super arty. (Have lots of black available, it is important!) This is where, if you do not already stock these as part of your programming supplies, the bulk of the budget will go. If you are able to, I recommend scouting places like TJMaxx and Ross as they often offer deep discounts on art supplies. I do not recommend using washable markers as these smear too easily, but colored pencils will work also.
- Rulers or straight-edges.
- Pencils.
- Good quality erasers such as art gum erasers.
- Optional: 6-sided dice and a worksheet for “roll a Picasso,” such as can be found here. There are other similar sheets all over Pinterest that you can use and you don’t need to do this a dice game, but it is fun, and the worksheet provides patrons a point of reference for shapes.
What You Will Do:
Take a piece of canvas paper and a straight edge and draw intersecting lines in pencil any way you like. It is important to do these lightly and in pencil as they will be erased later.
Over top of these pencil lines, use a black paint pen or black permanent marker to draw your basic face/head shape. You can divide this face shape up in as many sections as you wish. Keep in mind each section will be a different color.
Erase any pencil lines inside your face/head.
Use the worksheet linked above to draw inspiration for eye shapes, nose shapes, mouth shapes and ear shapes. Draw these in with black paint pen. Your patrons can place these literally anywhere on and around the face.
Color in each shape and/or section in colors of your choice. Don’t worry if you color over the black line, you can re-draw the black lines as your last step.
Color in any sections outside of the face shape that were made by the pencil marks. Do not go over these shapes with black marker to define the separate sections.
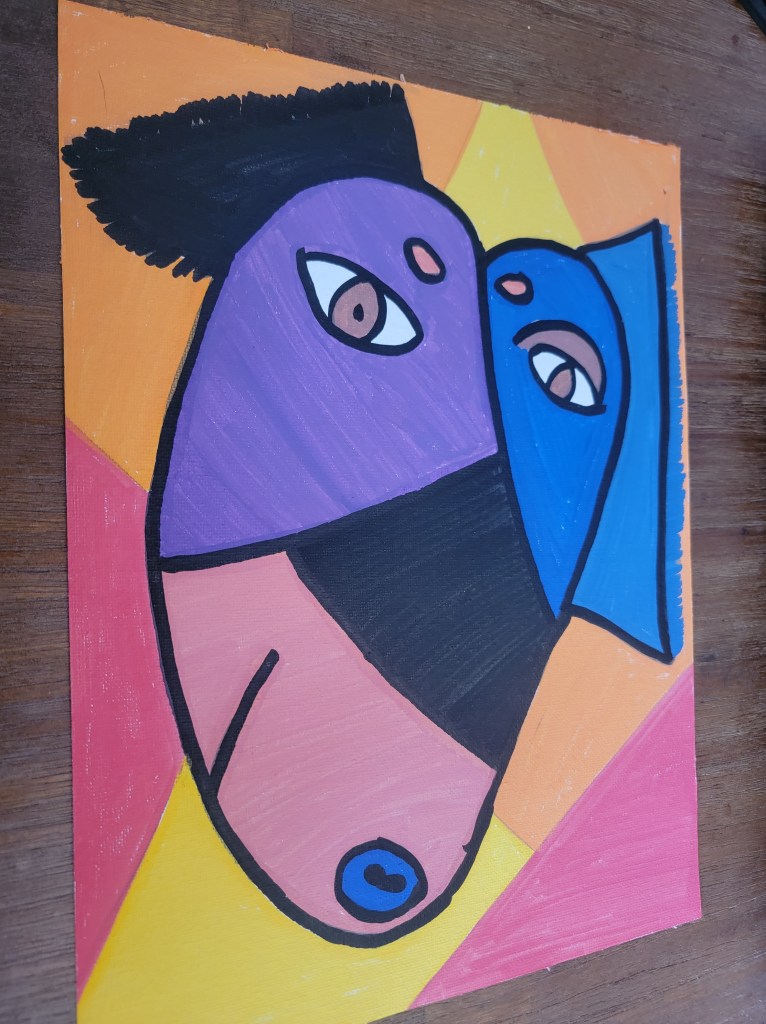
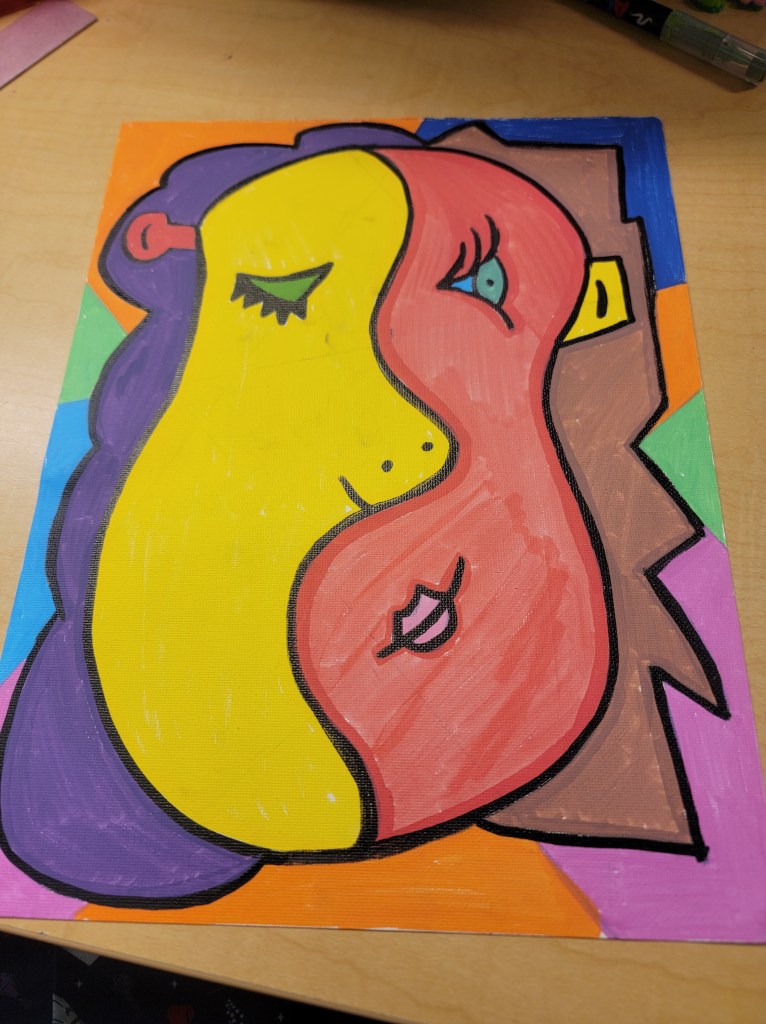
Keep in mind, acrylic markers do dry faster than acrylic paint, but they do still take time to dry! Patrons will still need to be careful taking their paintings home though I have found that about an hour or so will do for being totally dry. Here are the paintings I made of myself and my dogs so you can see the finished product.


Leave a comment